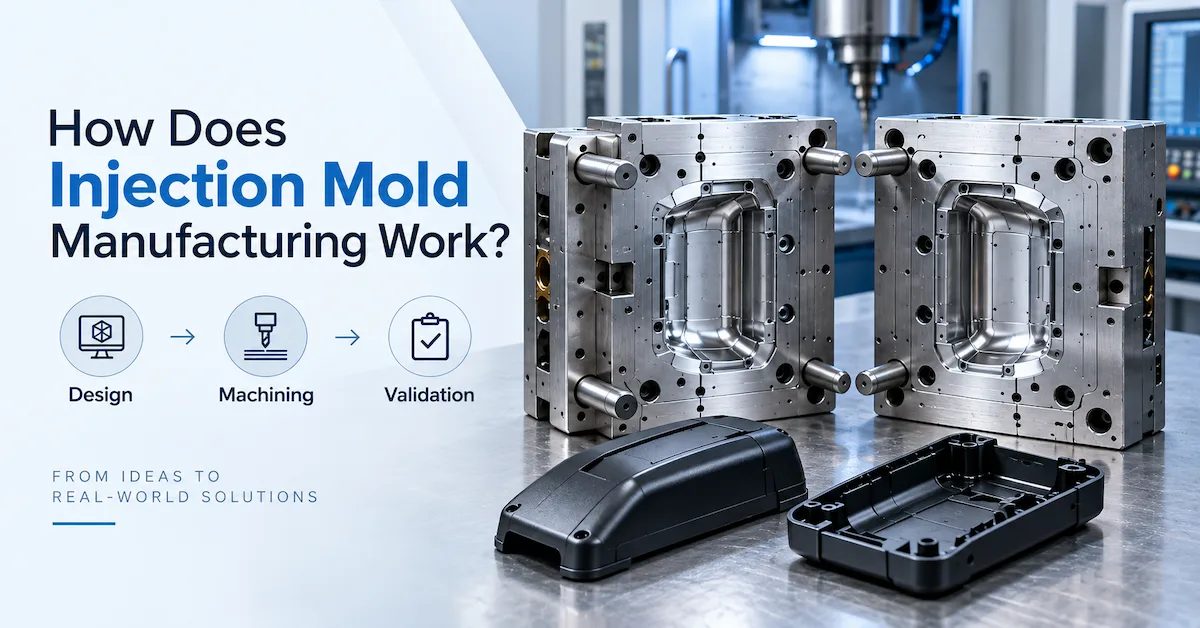
How Does Injection Mold Manufacturing Work?
For companies developing plastic products, understanding how does injection mold manufacturing work is essential before starting a tooling project.
Injection mold manufacturing is not simply cutting a metal block into a desired shape. A professional injection mold is a highly engineered production system designed to repeatedly manufacture plastic parts with controlled dimensions, appearance, strength, and assembly performance.
The complete process connects product engineering, tooling design, precision machining, validation, and production control.
A typical injection mold manufacturing workflow includes:
- Product requirement analysis
- Design for Manufacturing (DFM)
- Mold structure design
- Mold steel selection
- CNC machining
- EDM processing
- Grinding and polishing
- Mold assembly
- Trial molding
- Dimensional inspection
- Mold modification
- Production approval
- Maintenance support
Each stage affects the final performance of the mold.
A mistake during product design review may become a tooling problem.
A tooling mistake may become a production defect.
A production defect may become a cost problem.
That is why experienced buyers evaluate the entire manufacturing process rather than only the final mold price.
The objective of professional injection mold manufacturing is:
Create a reliable tool that can repeatedly produce qualified parts at the required production volume.
DX Molding supports customers through custom plastic injection mold manufacturing, including engineering review, mold design, precision manufacturing, trial molding, inspection, and production preparation.
Why Should Buyers Understand the Injection Mold Manufacturing Process?
Many buyers first contact a mold supplier when they already have:
- Product drawings
- CAD files
- Prototype samples
- Production requirements
However, the quotation they receive represents the result of many hidden engineering decisions.
For example, two suppliers may quote different prices because they are making different assumptions about:
- Mold structure
- Steel selection
- Number of cavities
- Cooling system
- Runner design
- Ejection method
- Surface finish
- Trial requirements
- Inspection standards
Without understanding the manufacturing process, buyers may compare quotations that are not technically equivalent.
A lower quotation may exclude important elements such as:
- Additional engineering review
- Better tooling components
- Extra trial rounds
- Spare parts
- Inspection reports
- Mold maintenance planning
A professional buyer should understand what happens before, during, and after mold manufacturing.
What Are the Main Stages of Injection Mold Manufacturing?
A complete injection mold manufacturing project usually follows several major stages.
| Stage | Main Purpose |
|---|---|
| Product Review | Understand part function, application, and requirements |
| DFM Analysis | Identify manufacturing risks before tooling |
| Mold Design | Develop cavity, cooling, runner, and ejection structure |
| Material Selection | Choose suitable steel and components |
| Machining | Manufacture precision mold components |
| Assembly | Fit and test mold components |
| Trial Molding | Validate mold performance |
| Inspection | Confirm dimensions and quality |
| Modification | Improve tool performance |
| Production Release | Prepare for stable manufacturing |
Each stage creates information needed for the next stage.
Skipping early engineering work often creates more cost later.
Step 1: Product Requirement Review Before Mold Manufacturing
The first step in how injection mold manufacturing works is understanding the product itself.
A mold manufacturer needs more than a 3D model.
The engineering team should understand:
- Product application
- Functional requirements
- Assembly relationship
- Material requirements
- Surface finish
- Expected production quantity
- Mold life requirement
- Quality expectations
- Production location
A product design that looks acceptable on screen may still create manufacturing challenges.
Why Product Application Changes Mold Design
The same plastic part geometry can require different tooling approaches depending on the application.
Consumer Products
May prioritize:
- Appearance
- Color consistency
- Surface finish
- Cost efficiency
Automotive Components
May prioritize:
- Long production life
- Dimensional stability
- Assembly accuracy
- Cosmetic requirements
- Repeatability
Industrial Components
May prioritize:
- Mechanical strength
- Temperature resistance
- Wear resistance
- Functional reliability
The mold supplier needs application knowledge because tooling decisions should support the final use condition.
What Information Should Buyers Provide?
A complete project input helps engineers make better decisions.
Recommended information includes:
| Information | Why It Matters |
|---|---|
| 3D CAD | Defines product geometry |
| 2D drawing | Defines tolerances and critical dimensions |
| Material specification | Influences shrinkage and processing |
| Annual volume | Determines tooling strategy |
| Surface requirement | Influences finishing method |
| Assembly information | Defines critical interfaces |
| Application | Determines performance requirements |
| Mold destination | Affects transfer planning |
DX Molding allows customers to submit project details through its contact page for tooling evaluation and manufacturing discussion.
Step 2: Design for Manufacturing (DFM) Analysis
Before mold design begins, professional manufacturers perform DFM analysis.
DFM means:
Design for Manufacturing
It evaluates whether the product design can be manufactured efficiently and consistently.
The goal is not to change the product unnecessarily.
The goal is to identify problems before they become expensive tooling modifications.
A DFM review normally examines:
- Draft angle
- Wall thickness
- Ribs
- Bosses
- Undercuts
- Parting line
- Gate location
- Cooling requirements
- Ejection method
- Shrinkage
- Sink marks
- Warpage
- Assembly interference
DX Molding provides engineering and technical support including DFM review, manufacturing risk analysis, mold design support, and production preparation.
Draft Angle Review
Draft angle allows the molded part to release from the mold surface.
Without enough draft, the part may experience:
- Scratching
- Drag marks
- High ejection force
- Surface damage
- Deformation
Draft requirements depend on:
- Material
- Texture
- Surface finish
- Part depth
- Ejection direction
A textured surface usually requires more attention than a smooth surface.
Wall Thickness Optimization
Wall thickness affects:
- Filling behavior
- Cooling time
- Shrinkage
- Warpage
- Material consumption
- Structural performance
A common mistake is assuming thicker walls always create stronger parts.
Excessive thickness can create:
- Sink marks
- Uneven cooling
- Longer cycle time
- Internal stress
Instead, engineers often use:
- Ribs
- Supports
- Structural geometry
- Material selection
to improve strength without creating molding problems.
Rib and Boss Design Review
Ribs and bosses are essential features in many plastic products.
They provide:
- Structural reinforcement
- Screw mounting
- Positioning
- Assembly support
However, poor design may create:
- Sink marks
- Filling problems
- Cosmetic defects
A professional DFM review evaluates internal features together with external surfaces.
Undercut Evaluation
Undercuts increase mold complexity.
Common examples include:
- Clips
- Hooks
- Side holes
- Locking structures
- Internal features
Solutions may include:
- Slides
- Lifters
- Inserts
- Design modification
The first engineering question should always be:
Is this feature necessary for product function?
If yes, the mold should be designed accordingly.
If no, simplifying the design may reduce:
- Tooling cost
- Manufacturing difficulty
- Maintenance requirements
Step 3: Injection Mold Design Process
After DFM approval, the next stage of how injection mold manufacturing works is converting the approved product design into a complete mold structure.
Mold design determines how the tool will:
- Fill with molten plastic
- Cool the part
- Release the part
- Maintain dimensional accuracy
- Support long-term production
A professional mold design includes multiple systems working together:
- Core and cavity
- Parting line
- Runner system
- Gate system
- Cooling channels
- Ejection system
- Slides and lifters
- Mold base
- Standard components
A weak mold concept cannot be corrected simply by improving machining accuracy.
The mold structure must be correct before manufacturing begins.
Core and Cavity Design
The core and cavity create the final shape of the molded component.
During design, engineers consider:
- Product geometry
- Shrinkage compensation
- Surface finish
- Mold strength
- Wear areas
- Maintenance requirements
Plastic materials shrink after cooling.
Therefore, the cavity dimensions cannot always be identical to the final product dimensions.
Engineers must consider:
- Resin shrinkage rate
- Cooling behavior
- Part geometry
- Mold temperature
- Processing conditions
Parting Line Design
The parting line is where the mold separates during opening.
A good parting-line design affects:
- Flash control
- Product appearance
- Mold complexity
- Ejection
- Manufacturing cost
For cosmetic components, parting-line placement requires additional attention.
A technically functional parting line may still be unacceptable if it creates:
- Visible marks
- Uneven surfaces
- Difficult finishing requirements
Therefore, parting-line decisions should be reviewed with the product team before mold manufacturing.
Gate Design
The gate controls how molten plastic enters the mold cavity.
Gate design influences:
- Filling balance
- Weld lines
- Air traps
- Packing efficiency
- Surface appearance
- Shrinkage
- Warpage
Common gate considerations include:
- Gate position
- Gate size
- Gate type
- Gate vestige
- Cosmetic requirements
A smaller gate is not always better.
The best gate location is the one that provides a balance between:
- Product appearance
- Filling performance
- Dimensional stability
- Production efficiency
Runner System Design
The runner system delivers molten plastic from the injection machine to the cavity.
Common options include:
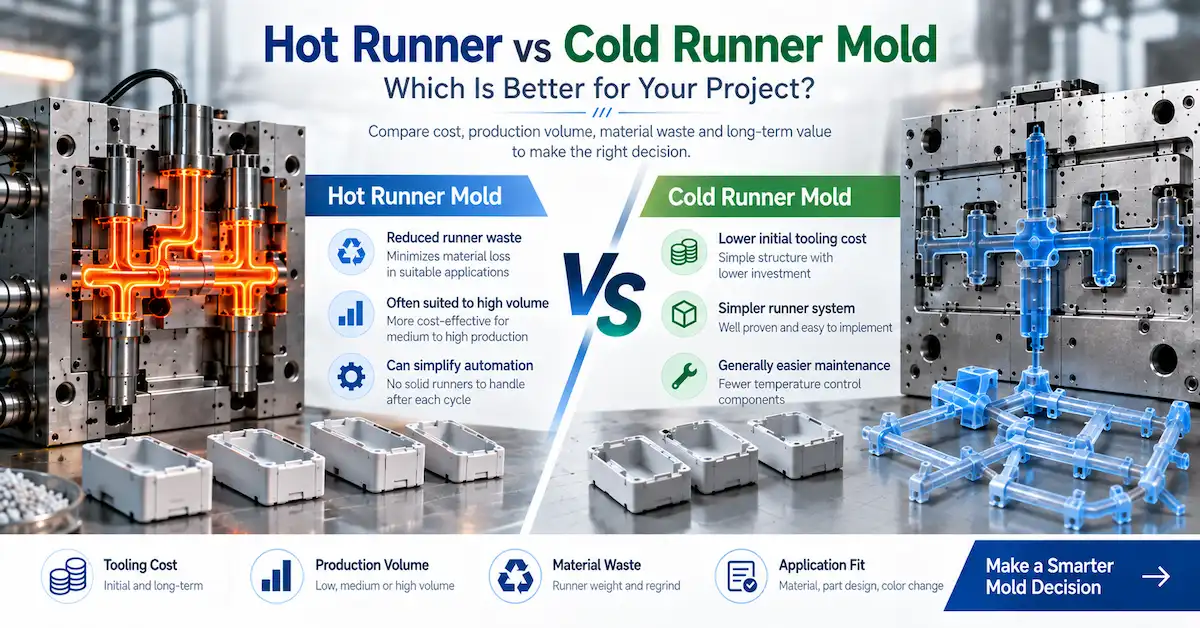
Cold Runner System
Advantages:
- Lower tooling complexity
- Lower initial investment
- Easier maintenance
Considerations:
- Runner material generation
- Additional separation process
- Possible material waste
Hot Runner System
Advantages:
- Reduced runner waste
- Better material efficiency for suitable applications
- Potential cycle-time advantages
Considerations:
- Higher tooling investment
- More components
- Additional maintenance requirements
The correct choice depends on:
- Production volume
- Material cost
- Part design
- Number of cavities
- Maintenance capability
DX Molding provides different mold solutions according to project requirements through its custom injection mold manufacturing services.
Cooling System Design
Cooling is one of the most important elements of injection mold design.
A mold does not simply need to fill correctly.
It must also remove heat efficiently.
Cooling affects:
- Cycle time
- Dimensional stability
- Warpage
- Surface quality
- Production consistency
A poor cooling design may cause:
- Uneven shrinkage
- Longer production cycles
- Part deformation
- Quality variation
Engineers consider:
- Cooling channel location
- Distance from cavity surface
- Hot spots
- Core cooling
- Insert cooling
Ejection System Design
After molding, the plastic part must be removed from the cavity.
The ejection system may include:
- Ejector pins
- Ejector plates
- Lifters
- Stripper plates
A poor ejection design can create:
- Ejector marks
- Part deformation
- Cracking
- Sticking
- Surface damage
The ejection system must consider:
- Part geometry
- Draft angle
- Cosmetic surfaces
- Material properties
- Required production speed
Slides and Lifters for Complex Parts
Many plastic parts contain features that cannot be released with simple vertical ejection.
Examples:
- Side holes
- Clips
- Hooks
- Locking structures
- Internal features
These may require:
- Slides
- Lifters
- Inserts
- Side cores
Additional mechanisms increase:
- Tooling complexity
- Manufacturing time
- Maintenance requirements
- Potential wear points
Therefore, engineers should evaluate whether the product design truly requires these features.
Step 4: Mold Material and Steel Selection
Selecting the correct mold material is an important part of injection mold manufacturing.
The mold must survive:
- Injection pressure
- Repeated opening cycles
- Material wear
- Temperature changes
- Mechanical stress
Common mold steels include:
| Steel | Typical Characteristics |
|---|---|
| P20 | General-purpose tooling applications |
| 718H | Good machining and polishing performance |
| NAK80 | Suitable for high-quality surface requirements |
| S136 | Good corrosion resistance and polishing performance |
| H13 | Suitable for demanding thermal conditions |
However, there is no single “best” steel.
The correct selection depends on:
- Production volume
- Resin type
- Glass fiber content
- Surface requirements
- Corrosion risk
- Mold life expectation
Mold Life Planning
Buyers should define expected mold life before manufacturing.
A tool for:
- Prototype production
- Small batches
- High-volume automotive programs
should not use the same specification.
Factors affecting mold life include:
- Steel selection
- Heat treatment
- Wear components
- Sliding mechanisms
- Maintenance plan
- Resin abrasiveness
A professional supplier selects tooling specifications based on actual production requirements.
Step 5: Precision Machining During Injection Mold Manufacturing
After mold design and material approval, manufacturing begins.
This stage converts engineering drawings into physical mold components.
Major processes include:
- CNC machining
- EDM
- Wire EDM
- Grinding
- Polishing
- Surface treatment
CNC Machining Process
CNC machining creates many major mold components.
Applications include:
- Mold plates
- Core blocks
- Cavity blocks
- Inserts
- Structural components
Machining quality depends on:
- Machine accuracy
- Cutting strategy
- Tool selection
- Material condition
- Inspection method
Precision machining is important, but it must support the final mold function.
A perfectly machined component cannot compensate for poor mold design.
EDM Machining Process
EDM is widely used for complex mold features.
It is especially useful for:
- Deep cavities
- Narrow slots
- Sharp corners
- Hardened steel
- Complex geometry
EDM helps manufacturers create details that may be difficult with traditional cutting methods.
Important EDM factors include:
- Electrode quality
- Spark control
- Surface finish
- Final polishing requirements
Grinding and Precision Finishing
Grinding improves:
- Flatness
- Parallelism
- Component accuracy
- Assembly precision
It is commonly used for:
- Mold plates
- Precision inserts
- Sliding components
- Shut-off areas
Polishing and Texture Processing
Surface finishing directly affects the final molded product.
Different requirements include:
Mirror Finish
Used for:
- Optical parts
- Transparent components
- High-gloss surfaces
Texture Finish
Used for:
- Automotive interiors
- Consumer products
- Functional surfaces
Matte Finish
Used when:
- Reflection reduction
- Premium appearance
- Fingerprint reduction
is required.
Surface finishing should be considered during mold design, not after production problems appear.
Step 6: Mold Assembly and Precision Fitting
After machining, components are assembled into the complete mold.
The assembly stage verifies whether all components work together.
The process includes:
- Core and cavity installation
- Insert fitting
- Slide installation
- Lifter installation
- Ejection system assembly
- Cooling system checking
- Mold movement testing
Why Mold Fitting Determines Final Performance
A mold contains many precision components.
Small assembly errors can create:
- Flash
- Misalignment
- Uneven wear
- Dimensional problems
- Production instability
Important checks include:
Parting Surface Contact
Ensures:
- Proper sealing
- Reduced flash risk
- Stable mold closing
Moving Component Alignment
Checks:
- Slide movement
- Lifter operation
- Wear condition
- Return position
Ejection Function
Verifies:
- Smooth release
- Correct ejector movement
- No interference
Step 7: Injection Mold Trial and Validation Process
A completed mold is not automatically a qualified production tool.
Trial molding verifies whether the mold can actually produce acceptable parts.
The trial process usually includes:
- Mold installation
- Machine setup
- Material preparation
- Sample production
- Quality evaluation
- Engineering improvement
T0 Trial
T0 is the first mold trial.
The purpose is to understand initial mold behavior.
Engineers check:
- Mold operation
- Filling condition
- Ejection
- Short shots
- Flash
- Basic appearance
- Major dimensions
T0 identifies problems requiring improvement.
T1 Trial
After modifications, the mold enters another validation stage.
T1 focuses on:
- Corrected defects
- Improved dimensions
- Better appearance
- Assembly performance
- Process stability
Typical adjustments include:
- Gate modification
- Vent improvement
- Cooling adjustment
- Ejector correction
- Dimension compensation
T2 and Final Validation
Complex projects may require additional trials.
Final approval may include:
- CMM measurement
- Dimensional report
- Appearance approval
- Assembly testing
- Process confirmation
DX Molding supports mold trial and validation processes including T0/T1/T2 evaluation, inspection, modification tracking, and production preparation.
Step 8: Injection Mold Quality Inspection and Validation
After mold trials, the next important stage in how injection mold manufacturing works is quality validation.
A mold is not qualified because it can produce one acceptable sample.
A production-ready mold should demonstrate that it can repeatedly manufacture parts that meet:
- Dimensional requirements
- Appearance standards
- Assembly requirements
- Functional requirements
- Production expectations
Quality validation connects the mold trial results with future mass production.
Dimensional Inspection of Molded Parts
Dimensional inspection verifies whether the molded part matches:
- 2D drawings
- 3D CAD model
- Approved samples
- Customer requirements
Common measurement methods include:
- Calipers
- Micrometers
- Height gauges
- Fixtures
- CMM inspection
The inspection method should match the importance of the dimension.
A cosmetic dimension may require different evaluation from a critical assembly interface.
Critical Dimension Control
Not all dimensions have equal importance.
A professional injection mold manufacturing project identifies:
Critical-to-Function Dimensions
These may include:
- Assembly holes
- Connector positions
- Sealing surfaces
- Moving interfaces
- Mounting points
Cosmetic Requirements
These may include:
- Surface appearance
- Texture
- Gloss
- Visible gate marks
- Parting line position
General Dimensions
These may have wider acceptable ranges because they do not directly affect product performance.
This approach helps companies focus quality resources where they create the most value.
CMM Inspection in Injection Mold Projects
Coordinate Measuring Machine (CMM) inspection is commonly used for precision plastic components.
It helps verify:
- Position accuracy
- Flatness
- Hole locations
- Complex geometry
- Critical interfaces
However, CMM results are only meaningful when:
- The correct datum system is used
- The fixture is appropriate
- The measurement method is defined
- The part condition is controlled
Measurement accuracy depends on the entire inspection system.
First Article Inspection
First Article Inspection (FAI) confirms that the first approved production parts meet requirements.
A first article report may include:
- Dimensional results
- Material confirmation
- Appearance inspection
- Assembly verification
- Functional checks
FAI creates a reference point for future production.
Step 9: Injection Mold Modification and Optimization
A professional mold manufacturing process usually includes improvement cycles.
The first trial often reveals areas requiring optimization.
Common improvement activities include:
- Gate adjustment
- Vent improvement
- Cooling modification
- Ejector adjustment
- Surface correction
- Dimensional compensation
- Slide refinement
Why Mold Modification Is Normal
Complex injection molds contain many interacting systems:
- Product geometry
- Plastic flow
- Cooling behavior
- Ejection
- Mechanical movement
- Surface requirements
Even with advanced simulation and engineering review, real molding conditions may reveal additional optimization opportunities.
The key difference is whether modifications are controlled.
Controlled Engineering Changes
Every mold modification should record:
- Problem description
- Root cause
- Recommended solution
- Modification action
- Updated drawing
- Trial result
- Approval status
Without proper records, future maintenance becomes difficult.
A mold may operate for years.
Clear history helps engineers understand previous decisions.
Step 10: Moving From Mold Manufacturing to Mass Production
After approval, the mold enters production.
However, successful injection molding depends on more than a completed tool.
Stable production requires controlling:
- Material
- Machine conditions
- Process parameters
- Operators
- Inspection
- Maintenance
Injection Molding Process Control
Important parameters include:
- Melt temperature
- Mold temperature
- Injection speed
- Injection pressure
- Holding pressure
- Cooling time
- Cycle time
The objective is not to find one perfect setting.
The objective is to establish a stable process window.
A stable process allows production teams to maintain:
- Consistent dimensions
- Lower defect rates
- Predictable cycle time
- Reduced operator adjustment
Material Control During Production
Plastic material directly affects molded-part quality.
Important considerations include:
- Resin grade
- Material supplier consistency
- Moisture control
- Drying requirements
- Regrind management
- Storage conditions
Even a well-designed mold can produce unstable parts if material conditions change.
Common Injection Molding Defects and Root Causes
Understanding defects is an important part of understanding how injection mold manufacturing works.
Many quality issues are not caused by one single factor.
They may involve:
- Product design
- Mold design
- Tool condition
- Process parameters
- Material behavior
| Defect | Possible Causes | Improvement Direction |
|---|---|---|
| Flash | Poor shut-off, excessive pressure, wear | Check mold fitting and process |
| Sink marks | Thick sections, poor cooling, packing issues | Improve geometry and cooling |
| Short shots | Poor filling, insufficient venting, low pressure | Review flow and process |
| Warpage | Uneven cooling, shrinkage differences | Optimize cooling and design |
| Weld lines | Multiple flow fronts | Review gate and flow strategy |
| Burn marks | Poor venting, trapped air | Improve venting |
| Flow marks | Filling instability | Adjust gate and process |
| Ejector marks | Poor ejection design | Improve ejection system |
The correct solution starts with identifying the actual root cause.
Step 11: Injection Mold Maintenance and Lifecycle Management
A high-quality mold requires ongoing maintenance after production begins.
A common mistake is assuming mold quality ends after approval.
In reality, production gradually changes tooling conditions.
Wear can occur on:
- Slides
- Lifters
- Ejector pins
- Inserts
- Shut-off areas
- Guide components
Preventive Maintenance Activities
Typical maintenance includes:
- Mold cleaning
- Lubrication
- Rust prevention
- Cooling inspection
- Wear inspection
- Component replacement
- Surface inspection
Preventive maintenance helps reduce:
- Unexpected downtime
- Quality variation
- Emergency repairs
- Production interruption
DX Molding provides mold lifecycle support including maintenance, troubleshooting, spare parts, refurbishment, and modification services.
Replaceable Components and Long-Term Tool Strategy
For long production programs, engineers should consider replaceable components.
Examples include:
- Inserts
- Wear plates
- Ejector components
- Gate components
- Slide wear parts
A maintainable mold is often more valuable than a mold designed only for initial approval.
Step 12: How Much Does Injection Mold Manufacturing Cost?
The cost of injection mold manufacturing depends on many engineering factors.
There is no universal mold price.
The major cost drivers include:
| Cost Factor | Influence |
|---|---|
| Product complexity | More features require more tooling work |
| Mold size | Larger tools require more material and machining |
| Number of cavities | More cavities increase complexity |
| Steel selection | Higher-performance materials affect cost |
| Surface finish | Polishing and texture increase processing |
| Tolerance requirements | Precision increases machining and inspection |
| Runner system | Hot runner adds system complexity |
| Mold mechanisms | Slides and lifters increase design effort |
| Trial requirements | More validation increases engineering time |
| Production volume | Influences mold-life requirements |
Why the Lowest Mold Quote Is Not Always the Best Choice
A low quotation may exclude:
- Detailed DFM
- Better steel
- Additional trials
- Spare parts
- Inspection reports
- Maintenance planning
- Transfer documentation
The true project cost includes:
Tooling Investment + Production Stability + Maintenance + Downtime Risk
A slightly higher-quality mold may reduce total cost over the product lifecycle.
Step 13: How Should Buyers Evaluate Injection Mold Manufacturers?
Understanding the manufacturing process helps buyers ask better questions.
Instead of asking:
“Can you make injection molds?”
ask:
“How do you control each stage of the manufacturing process?”
Evaluate Engineering Capability
Review whether the supplier can provide:
- Product review
- DFM analysis
- Mold design
- Material recommendations
- Manufacturing risk evaluation
Evaluate Manufacturing Capability
Check:
- CNC machining
- EDM capability
- Grinding
- Polishing
- Assembly
- Inspection
Evaluate Validation Capability
Ask about:
- T0/T1/T2 trials
- Sample approval
- Dimensional reports
- Defect analysis
- Modification records
Evaluate Production Support
Confirm whether the supplier can support:
- Mass production
- Process optimization
- Maintenance
- Spare parts
- Mold modification
DX Molding provides custom manufacturing solutions covering engineering review, mold development, injection molding, and production support.
What Should Buyers Prepare Before Starting an Injection Mold Project?
A complete RFQ improves tooling decisions.
Recommended information includes:
- 3D CAD files
- 2D drawings
- Material specification
- Product application
- Annual production volume
- Critical dimensions
- Surface requirements
- Assembly requirements
- Color requirements
- Texture requirements
- Expected mold life
- Production location
- Quality documentation requirements
Injection Mold Manufacturing Checklist
Before approving a tooling project, buyers should confirm:
Product Requirements
✓ Product function defined
✓ Material confirmed
✓ Critical dimensions identified
✓ Surface requirements documented
DFM Review
✓ Draft reviewed
✓ Wall thickness checked
✓ Ribs and bosses reviewed
✓ Undercuts evaluated
✓ Assembly risks analyzed
Mold Design
✓ Cavity layout approved
✓ Gate strategy reviewed
✓ Cooling system confirmed
✓ Ejection system reviewed
✓ Steel selection approved
Manufacturing
✓ CNC process controlled
✓ EDM completed where required
✓ Components inspected
✓ Mold assembly verified
Validation
✓ T0/T1/T2 completed if required
✓ Samples approved
✓ Dimensions verified
✓ Production process confirmed
Production
✓ Maintenance plan established
✓ Spare parts prepared
✓ Quality monitoring defined
Frequently Asked Questions
What Is the First Step in Injection Mold Manufacturing?
The first step is product requirement review. Engineers evaluate product design, material, production volume, quality requirements, and manufacturing feasibility before mold design begins.
How Long Does Injection Mold Manufacturing Take?
The timeline depends on mold complexity, size, cavity number, material, surface requirements, trial requirements, and modification cycles.
Why Is DFM Important Before Making a Mold?
DFM identifies manufacturing risks before tooling begins. It helps prevent problems related to draft, wall thickness, undercuts, cooling, ejection, appearance, and assembly.
What Materials Are Used to Make Injection Molds?
Common mold steels include P20, 718H, NAK80, S136, and H13. The correct material depends on production requirements, resin, wear, corrosion, and surface needs.
What Happens During an Injection Mold Trial?
A mold trial verifies whether the tool can produce acceptable parts. Engineers evaluate filling, ejection, defects, appearance, dimensions, and required improvements.
What Are T0, T1, and T2 Mold Trials?
T0 is the initial mold test. T1 verifies improvements after corrections. Additional trials may be required until the mold meets project requirements.
Can One Supplier Handle Both Mold Manufacturing and Production?
Yes. Many OEM buyers prefer suppliers that can support both tooling and injection molding because it simplifies communication and production transition.
How Do I Select an Injection Mold Manufacturer?
Evaluate engineering capability, DFM process, mold design experience, machining capability, validation process, quality control, and lifecycle support.
Why Do Injection Molds Need Maintenance?
Molds contain moving and wearing components. Preventive maintenance helps maintain quality, reduce downtime, and extend tool life.
What Information Should I Provide for an Injection Mold Quote?
Provide CAD files, drawings, material, quantity, application, tolerances, surface requirements, production expectations, and quality requirements. You can contact DX Molding for tooling evaluation.
Conclusion
Understanding how injection mold manufacturing works helps buyers make better decisions before investing in tooling. A reliable mold is created through proper engineering review, DFM, mold design, precision machining, validation, quality control, and lifecycle management.
For a project-specific injection mold manufacturing review, prepare your CAD files, material requirements, production volume, critical dimensions, and application details, then contact DX Molding for engineering and tooling support.